There was a momentous event in June (wish I could say it included finishing the pond). My oldest daughter graduated from high school! Hard to imagine that time could pass so quickly. She will be leaving for college in California this fall. When the celebrating was done, I got back to building.
To cut out the bulkheads I used the same trick as with the forms: flat on a piece of styrofoam. I rough cut, then finished with a sanding station.
To remove foam for filling exposed edges, I use a Dremel 'steel brush' attachment. It could go through the laminate, but with a little care, only removes the foam. (The hose is from my dust collector.)
The full size templates make fitting very easy. I made each slightly small so that I would have a bed of fillet material under the edge.
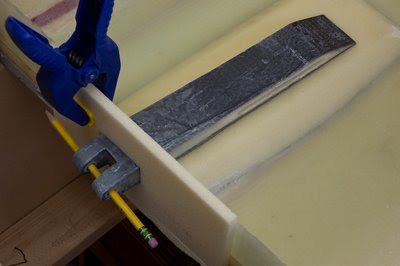
Since no clamping pressure is necessary, the placement gig only needs to hold the BH in proper orientation until cured. Originally, I had thought that the BH would be cut to size and fit in its correct location, but making them marginally smaller made me rethink things. A 1/4 inch MDF screwed at the centerline of the BH and placed across the form made the vertical placement easy; a small piece of BH material acting as a spacer between the MDF and the edge of the form took care of fore-aft placement; and a small level took care of the third critical element.
After testing and marking, I placed some fillet material on the hull, put the BH into position, and finished the fillet on each side with a plastic bag and a putty knife rounded to the size of an American quarter. I found this left a smooth finish and allowed me to pick up the excess material and return it to the bag, making for very little waste.
With the proper timing, the tape can be placed before the fillet cures completely. Since I use the PMVB technique on the tape, the cure must be solid enough to withstand pushing with the squeegee. If the fillet material will cure first, some PP will make sure no sanding has to be done before the taping.
During my first experience of PMVB on a fillet, I used small pieces of plastic to account for the curves of the hull, stiffener, keel, etc. This seemed too slow, so I started using one long, narrow piece. This allowed for working out the air and excess resin, but did not allow for a complete 'seal' like the technique does for flatter surfaces. In the end this didn't seem to matter, as you can differentiate a bubble that appears later under the plastic vs. one that appears under the glass. Wetting the plastic and cutting a small dart in it as you are proceeding can decrease any problems. In any event, it seemed superior to working the glass alone or with just PP. Extra layers of laminate are placed at the same time and I put small pieces of PP in areas that will have future layers, like near the keel, where it will eventually be taped together.
The chainplate is placed in its proper orientation on each of the left (for starboard) and right (for port) float halves (don't forget future deck thickness) and receives its extra glass.
I had constructed the deck flange mold such that it could be removed for fitting the chainplate while the hull was still in place on the forms/battens.
Then the big moment -- lifting out the float half! Pop the keel side and out she comes.
Lots of screw holes to fill, but the foam joins and fairness look pretty good.
Off to storage.
Starting another half.


No comments:
Post a Comment