I built several radius sanders, and finally settled on one that approached a 2-inch radius, was stiff enough, and had an ergonomic handle. I cut a partially-used hook and loop 36-grit sandpaper to size and held it in place by a strip of double-sided carpet tape. This makes it easy to change paper when necessary.
This model was then further modified so that it was not a full quarter round. Like I mentioned before (when placing the foam filler for the deck flange), the deck/hull angle is greater than 90º in areas and you can see how easy it was to make accidental grooves in the hull side. The modified version worked great, but I needed to be ever watchful -- things happen fast.
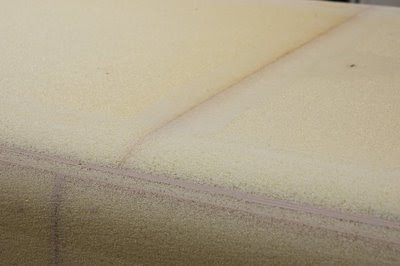
This shows the finished radius. The 'center' foam stripe is the foam filler for the deck flange with the QF attaching it to the hull below. The QF above is why I used two types of epoxy to join the deck – if this layer had been hard to sand, you can see what a nuisance it would have been. When using the radius sander, I did not notice the QF. But when doing the finishing touches with the long board, it's just like the keel – any QF that runs parallel to the long board can stay proud/high as the board rotates quickly over the slightly harder QF.
Once happy with the shape, I placed the extra schedules of glass on the bow cap. I put a rebate in the foam to hopefully make it easier to fair the final layer of glass. I've seen the glass placed different ways. I placed the glass folded across bow, tucked the keel, and didn't bother with going onto the deck except to overlap the join. This minimized cutting, shaping, and overlaps.
I used the PMVB, which worked perfect for the leading edge and sides. It becomes more tricky with complex curves and angles. I used multiple pieces of packing tape to help hold the complicated edges, but I must admit that I got a couple small waves or wrinkles from the tension or pull that I applied to these. This aspect needs further evaluation.
My glass comes in 50-inch widths. In preparing to glass the sides I cut off a strip that was wide enough to make the wingnet rails. Doing this to both sides produced enough for one rail, and I plan to cut one 50-inch width in half to produce enough for two decks. This really leaves very little wastage except shaping the sides along towards the transom.
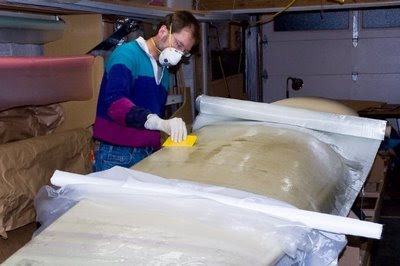
Repeating my usual technique: wet foam, wet glass, *trim edge*, wet peel ply, (trim slightly larger), place plastic (trim slightly larger), wet plastic . . squeegee out excess.
I emphasized trimming after wetting. It is much easier to trim odd angles (anything other than 90º) to shape after wetting -- the viscosity of the resin tends to hold things together. The downside is that it does make it harder to save glass remnants to use later. Also, when stitched fabrics are cut at oblique angles, you invariably have some long strands that are not held in place. With PMVB the forceful squeegee action is often perpendicular to these strands and can force them out from the edge. Given that the edge will be feathered/faired, I don't think we were counting on these strands for any strength, but they can be an occasional nuisance.
You can see how the glass has to wrap around and under the keel. I found it easiest to wet the glass while holding it out from the boat, cut to shape, squeegee in place. Gravity slowly removes resin from the glass while on the verticle/upside down edge. And glass doesn't like to hang upside either. PMVB helps in both cases -- just make sure there's enough resin before placing the plastic.
I like the shape! You can see cured resin beaded on the plastic.
For working with edges that are on foam (verses overlapping another laminate layer), I used a painter's tool for dispensing tape and plastic at the same time. All the layers of glass, PP, and plastic went over this. It was easy to trim this with a sharp knife while green. It leaves an edge that's easy to feather on the radius, and all the other foam is clean.
I've so far been hesitant to do this over a cured laminate layer for fear of cutting the layer below. I still place the tape and plastic, but I only let the PP overlap the tape so no cutting is involved. The PP leaves a clean surface for secondary bonding and any sanding is just to feather the laminate edge.
Here you can see the feathered edge on the underside of the keel. My overlap may be excessive here, but at the time I was thinking cruiser strength, not racer weight.
Here's the backside of the bow after clean up. The two broad stripes of QF are fairing the rebate areas. Glassing the second side went the same way.
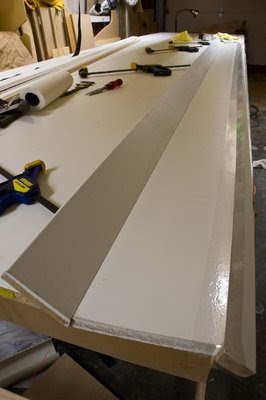
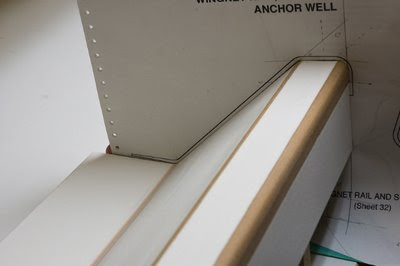
Before glassing the deck I decided to make the two wingnet rails. Angles and measurements are from full-size patterns. I used a couple pieces of MDF molding run through the table saw. One trick for gluing these together is to lay them out flat with the open angle next to table and tape them together. This tape acts like a hinge, holding the edge during gluing.
I used hot glue, thinking I didn't want to wait the 24 hours for my other glue to set, but I wouldn't do this again (at least at the temperatures of my garage). The glue would stiffen up before I could place it along the entire edge and close the joint (this even with a 'special' wood-working, extended open version). This made it hard to keep the same angles I cut. I purchased some 5 minute epoxy for the next time I have a project like this.
I routed the 90º edge, longboarded the other, and filled the last with QF.
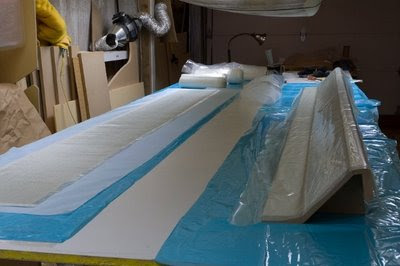
You can see the float suspended above the work table as I get ready to do the lay-up.


