Tuesday, May 31, 2011

May

This month and next have some momentous events – daughters graduating from college and high school.

I flew with my parents in their plane to Santa Barbara, CA.  Clear weather with great flying and views.


A view of Shelter Bay where my parents live.


Olympic Mountains between Seattle and the Pacific.


Being vectored towards Santa Barbara International.


I enjoyed the week in the sun, then the family gathered for a happy day. A proud dad.  (I'll boast: an excellent college career – graduating in 3 years Magna cum laude with a degree in english.


Here's the forward deck to cabin join.  The battens were cut and epoxied to shape before planking.  I placed the cabin first and then marked and cut a curve that fit to the flat deck.


The plan has a template for a suggested shape to the cabin side-to-top angle. I wanted to be able to have the cabin top 3/4 inch foam on top, so I planked it first.  That meant that I had to fit the cabin side in between it and the already glassed gunwale.  This was a nuscence.  Next time I think I'll do the cabin side, then trim it to slip the cabin top in behind it.

What better plan than to put the Graduate to work helping hold foam while I attached it from below.


After taping the structural requirements for the aft beam mount I'm planning on extending the coaming aft to the mainsail track. Not sure I can picture how this is going to all fit in here right now, so I left a little extra foam to trim later.


The next step was determining where to put the high density inserts for all the deck hardware.  I mapped out the companionway and forward hatches, the mast step, jib track, mast rotation blocks, and extra glass laminations called for.  The rest is left to the builder.  I looked at other websites, went down to the marina and looked and some boats, and contacted Jim Mackenzie of 'Raise a Little Hull.'  All these were helpful.

In the end I was able to relax a little bit by deciding that I would plan for what I should and might want to do – and deal with reality as it develops. A oversized insert because of indecision now is not that much of a weight penalty.  I also placed inserts for several potential winch and rope clutch positions, line organizer, and two potential places for lifting points as I hope to be in a dry mast-up storage with a crane launch.  Also the forward cleat, chocks, and pulpit.

The flush cut blade on a multitool makes this easy.


I took pictures and measurements – hoping to find them later.


Vacuum tape (on previous peel ply) and stapling glass in place along sacrificial edge.  The blue tape is just a guide for cutting how much glass overlap I want. (Glad I'd learned a couple tricks before this vertical section.)

Saturday, April 30, 2011

April

I pondered long and hard about how I would glass this section.  Part of me wanted to 'go for broke' and do it all.  Luckily better judgement prevailed – the reality of doing all the steps for vacuum bagging by myself is daunting.

I decided to divide it into two sections.  The obvious choice was then to run the glass in vertical sections. (I had done this in the floats.)  Since you can't do the section in one piece anyway, it's not as if its overlap vs. no overlap.  When adding up the extra by going this method, and then calculating the weight of 3 inches of glass and epoxy -- it seemed like a small difference given the advantages I perceived.

I finished placing the foam along the gunwale.


The edge has a thin skim of fairing material to help the vacuum tape seal.  For the vertical seal I epoxied on some peel ply to ensure easy removal of the vacuum tape.


With all the changing angles the edges of the glass don't lay straight.  Multiple pieces almost seemed an advantage for keeping the average orientation of the glass in its proper direction.

I put down some plastic under the glass while moving it around to get the proper orientation.  This kept it from snagging, then the plastic was easily removed from underneath.


After protecting the vacuum tape with a layer of clear packaging tape I wet out the cloth then peel ply.


Perforated release film and then breather.


And then the bag.  If I hadn't had stretchy bag material I may have been in trouble without enough pleats.  More next time.

Also I had trouble with a large leak.  Fortunately, I was able to hear it when the vacuum was turned off.  It was from a screw that was set too far, but hadn't been found before hand.  I turned off the vacuum and removed the screw.  I replaced it with a bamboo skewer and 5 min epoxy.  Once cured, I was able to achieve my vacuum.  Whew.


Looks like the right amount of resin.  I've never put on so much resin that I think, "thats too much" (meaning its easy to keep adding too much). So its great to see excess weight removed.  Also, I would have been stressed about getting the glass to tightly conform to all the angles, corners, and vertical sections.  The beauty of vacuum.


Happy with the result.


For the stern section I discovered a couple of things.

In thinking about the overlap, I remembered that I only needed to overlap in one direction.  In this case the vertical tows only need to butt against each other.  It's the bow-stern tows that need to overlap.  By pulling out the unnecessary tows I decreased the excess by nearly 50%.


There's a reason that there are no more pictures of glassing the stern section – stress!

What I discovered was that the vertical portion was large enough that my materials didn't want to stay in place.  The glass was only marginally a problem, though it was a bit of a battle between getting it into the concave areas and pulling it up the vertical face. The vacuum would take care of that. The problem really was the non-sticky layers.

The breather wouldn't stay where it was supposed to.  Trying to make the bag around it . . . then the glass would fall too. What a struggle. It was after midnight – and I could tell I was near my wits end.  I called my wife who helped calm me down.  Then I remembered Henny using staples to hold material in place – and it saved the day.

Luckily I had 1/4 inch staples on hand and with my wife's help was able to hold things in place on the sacrificial foam that was to be cut off later.  The bag was made and disaster averted.

I would have liked to incorporate the unidirectional along the keel while doing the original layup, but dividing it into sections precluded that.  So that was the next step.


Stapler in action!


Next was the cabin top. I changed batten material and got clear fir.  I had used it on the gunwale because I wanted something stronger since I would be walking on it. It seemed to work well on the gentle curve of the cabin.  Also, I was planning on putting pieces of 3/4 inch foam that were as large as possible without thermoforming and didn't know how much deformation force to the battens that would be.

You can see the break at the front deck to cabin area.  I hadn't appreciated how this break was not straight athwart ships, but slightly curved, sticking forward more in the center.


Around this time I began to experiment with over drilling the battens.  Hadn't really though about it before, but by over drilling you can get a compressive force drawing the pieces together. Similar to a screw that is only threaded on the section that goes into the second material.  Working with 3/4 inch material was easy because of the great holding power – 3/8 is another story.

In the end it took quite a bit of pressure to curve the panel into place (as in laying on my back and pushing with my feet), so it was nice to have some help tighten the screws from the back side.

Thursday, March 31, 2011

March

As always, when the time came, I was anxious to get back at it.

I had planked everything except the bow area.


I trimmed the foam along the gunwale and installed battens.  You can see the strip of high density foam along the keel that is required to strengthen the hull for trailering, and the sacrificial strip above for vacuum bagging.


As noted by others, the gunwale needs a 'break' because forward of this frame it is straight. This transition will actually disappear as this is the area that will be cut out and replaced by the forward beam mount.


I transitioned to full foam strips where the gunwale line begins to disappear.


Here is the bow, an area where all the curves nearly disappear. Since this area is extending past the last frame, I double checked its shape by measuring down from the bow template.  By adjusting a few of the battens I made sure that I had a uniform transition from the deck to the keel.


I tried a different approach to fill between the foam.  When planking the floats, I had produced a 'V' shape by using my router table prior to securing the strip. For this I had been planing to Dremel a notch between them, but I had difficulty controlling the depth and size. Now with the narrow gap already in place I decided that I could decrease the volume of filler material by only removing foam on one side with my knife.  I found this fast, easy, and surprisingly accurate.


Filled with the corner of a Zip-Lock bag cut off.


On the floats I had leveled this with a putty knife, but after sanding there was an obvious depression.  This time I made a small notch in the putty knife which left thin ridge.


If caught at the right time, it easily comes off with a scraper and then 36 grit -- just like the 'cheese grating' when fairing.


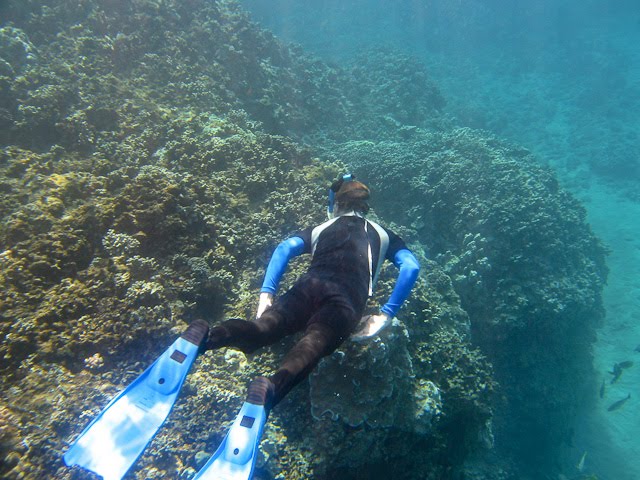
We closed off the month on Maui, Hawaii.  I enjoyed snorkeling every day.


The contrast of the volcano and . . .


. . . windward side was dramatic.


Monday, February 28, 2011

February

A couple planks placed – nothing else to report (except another year marked by my birthday).


Monday, January 31, 2011

January

A couple planks placed – nothing else to report.

Friday, December 31, 2010

December

The Holidays - no building.

Tuesday, November 30, 2010

November

No Building this month.

My wife is on the board of a nonprofit called Sister Connection, which supports Burundian widows and orphans. A decade of war has left thousands in need, and Sister Connection strives to help meet the basic daily needs of food, shelter, medical care, clothing, and education for many 'widows and orphans.

We took our youngest daughter and toured the activities of Sister Connection in Burundi. It's amazing the difference that can be made when people help people. It was also encouraging to see improvements in safety and economic development since the time my wife and I went to Rwanda and Burundi 10 years ago and helped at two hospitals.

Meeting a girl whom we have supported for ten years (through another organization) was an emotional experience. We felt we knew each other from shared pictures and stories over the years.


We had fun with all the children.


On the way home we went to Kenya and enjoyed the Masi Mara.