Wednesday, December 31, 2008

December

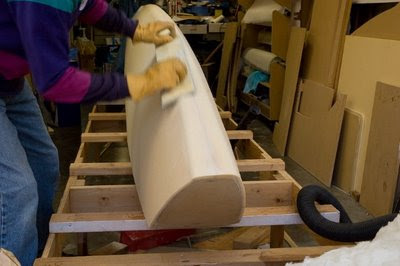
I built several radius sanders, and finally settled on one that approached a 2-inch radius, was stiff enough, and had an ergonomic handle. I cut a partially-used hook and loop 36-grit sandpaper to size and held it in place by a strip of double-sided carpet tape. This makes it easy to change paper when necessary.


This model was then further modified so that it was not a full quarter round. Like I mentioned before (when placing the foam filler for the deck flange), the deck/hull angle is greater than 90º in areas and you can see how easy it was to make accidental grooves in the hull side. The modified version worked great, but I needed to be ever watchful -- things happen fast.


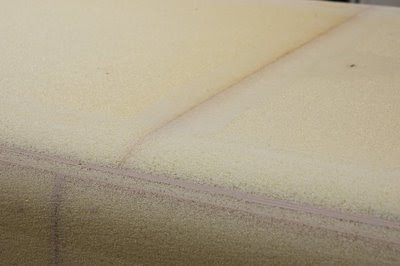
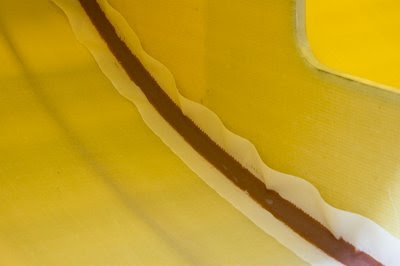
This shows the finished radius. The 'center' foam stripe is the foam filler for the deck flange with the QF attaching it to the hull below. The QF above is why I used two types of epoxy to join the deck – if this layer had been hard to sand, you can see what a nuisance it would have been. When using the radius sander, I did not notice the QF. But when doing the finishing touches with the long board, it's just like the keel – any QF that runs parallel to the long board can stay proud/high as the board rotates quickly over the slightly harder QF.


Once happy with the shape, I placed the extra schedules of glass on the bow cap. I put a rebate in the foam to hopefully make it easier to fair the final layer of glass. I've seen the glass placed different ways. I placed the glass folded across bow, tucked the keel, and didn't bother with going onto the deck except to overlap the join. This minimized cutting, shaping, and overlaps.

I used the PMVB, which worked perfect for the leading edge and sides. It becomes more tricky with complex curves and angles. I used multiple pieces of packing tape to help hold the complicated edges, but I must admit that I got a couple small waves or wrinkles from the tension or pull that I applied to these. This aspect needs further evaluation.


My glass comes in 50-inch widths. In preparing to glass the sides I cut off a strip that was wide enough to make the wingnet rails. Doing this to both sides produced enough for one rail, and I plan to cut one 50-inch width in half to produce enough for two decks. This really leaves very little wastage except shaping the sides along towards the transom.


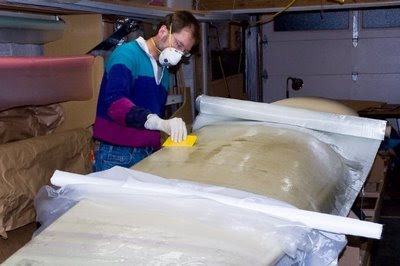
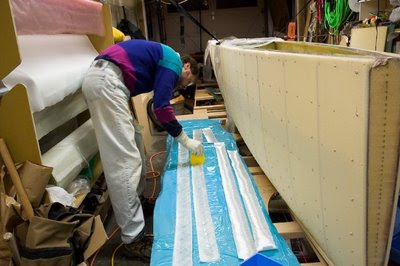
Repeating my usual technique: wet foam, wet glass, *trim edge*, wet peel ply, (trim slightly larger), place plastic (trim slightly larger), wet plastic . . squeegee out excess.

I emphasized trimming after wetting. It is much easier to trim odd angles (anything other than 90º) to shape after wetting -- the viscosity of the resin tends to hold things together. The downside is that it does make it harder to save glass remnants to use later. Also, when stitched fabrics are cut at oblique angles, you invariably have some long strands that are not held in place. With PMVB the forceful squeegee action is often perpendicular to these strands and can force them out from the edge. Given that the edge will be feathered/faired, I don't think we were counting on these strands for any strength, but they can be an occasional nuisance.

You can see how the glass has to wrap around and under the keel. I found it easiest to wet the glass while holding it out from the boat, cut to shape, squeegee in place. Gravity slowly removes resin from the glass while on the verticle/upside down edge. And glass doesn't like to hang upside either. PMVB helps in both cases -- just make sure there's enough resin before placing the plastic.


I like the shape! You can see cured resin beaded on the plastic.


For working with edges that are on foam (verses overlapping another laminate layer), I used a painter's tool for dispensing tape and plastic at the same time. All the layers of glass, PP, and plastic went over this. It was easy to trim this with a sharp knife while green. It leaves an edge that's easy to feather on the radius, and all the other foam is clean.

I've so far been hesitant to do this over a cured laminate layer for fear of cutting the layer below. I still place the tape and plastic, but I only let the PP overlap the tape so no cutting is involved. The PP leaves a clean surface for secondary bonding and any sanding is just to feather the laminate edge.


Here you can see the feathered edge on the underside of the keel. My overlap may be excessive here, but at the time I was thinking cruiser strength, not racer weight.


Here's the backside of the bow after clean up. The two broad stripes of QF are fairing the rebate areas. Glassing the second side went the same way.


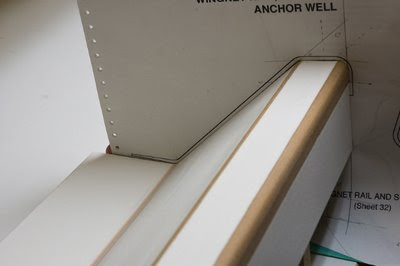
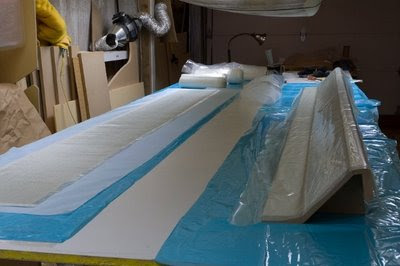
Before glassing the deck I decided to make the two wingnet rails. Angles and measurements are from full-size patterns. I used a couple pieces of MDF molding run through the table saw. One trick for gluing these together is to lay them out flat with the open angle next to table and tape them together. This tape acts like a hinge, holding the edge during gluing.

I used hot glue, thinking I didn't want to wait the 24 hours for my other glue to set, but I wouldn't do this again (at least at the temperatures of my garage). The glue would stiffen up before I could place it along the entire edge and close the joint (this even with a 'special' wood-working, extended open version). This made it hard to keep the same angles I cut. I purchased some 5 minute epoxy for the next time I have a project like this.


I routed the 90º edge, longboarded the other, and filled the last with QF.


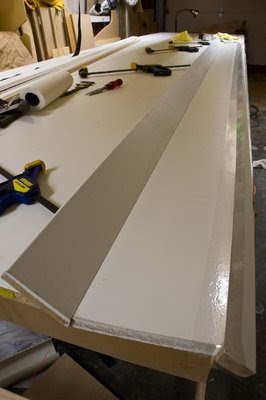
You can see the float suspended above the work table as I get ready to do the lay-up.

Sunday, November 30, 2008

November

Since I only have space to work on one float at a time, I switch them out as I'm moving along. This may make the pictures seem like they jump slightly -- I'm trying to not report on progress twice unless I've learned/tried something different.

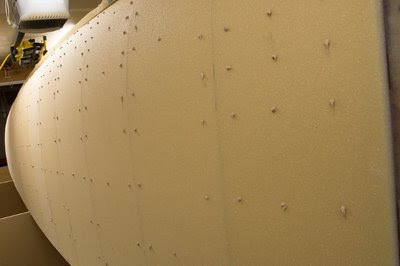
On this side, I filled screw holes and gaps before trying any attempt at fairing the foam. I think last time I was so excited to see the shape develop that I filled after, and of course will have to sand/fair twice.


I use a syringe with narrow attachment to get the QuickFair into the screw holes. They are deep and narrow so filling them from the 'inside out' is important. Remember that vinegar (any dilute acid) easily cleans tools, skin, and spills of uncured epoxy (which is a base). So, if you have a limited supply of that special tool (ie., the narrow tip attachment) you can reuse it as long as the acid is rinsed off before its next use.


Here I'm pre-wetting the tape for the inside keel join, including an extra layer along each side at the transom. Prepping this area as much as possible before the join obviously makes life easier. PMVB as usual.

Bold

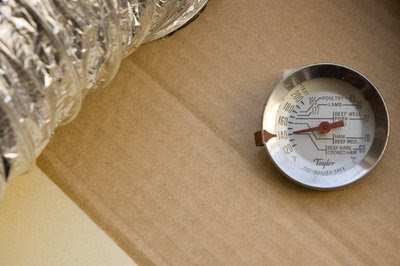
My plan is to post-cure the SilverTip laminating epoxy that I am using. When initially researching this, I wanted an epoxy designed especially for a fiberglass composite construction – the skins are the strength, not just protection, as it would be for a wood boat. SystemThree has several options, its PhaseTwo (special order, expensive . . .) and SilverTip. They state, "SilverTip 'Slow' laminating resin excels in application for composite-cored boats, exhibiting excellent mechanical properties, following a moderate post-cure." Moderate means 140ºF for two hours.

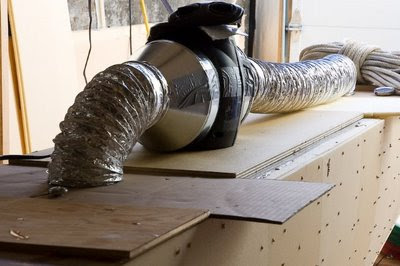
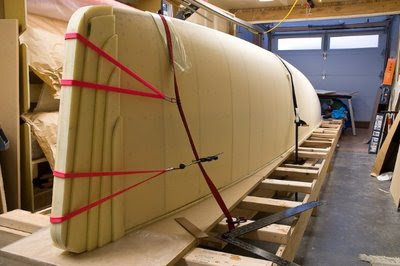
Since the foam is a great insulator and the hulls will have limited air flow after being closed up, I decided to cure the interior of the hull before closing it up. A little jury rigging and . . .


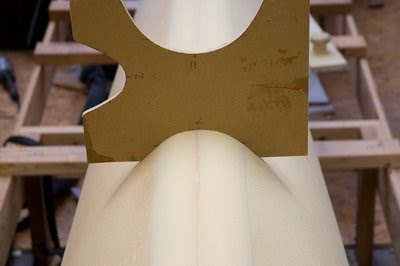
It's relatively easy to shape the keel using the guides for frames 2, 7, and 11.


I liked Tor's technique of having the deck flat and pulling the hull against it. My deck was in three parts which I fitted and glued while on top of the hull. It was then moved to the strong back and taped together.
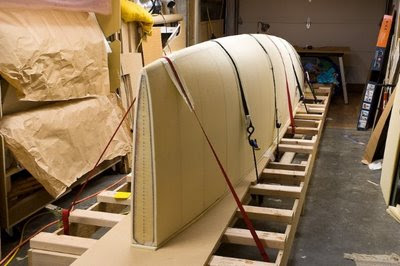
My plan was to put the joining bog mixture on the hull flange and then flip it onto the deck, align the beam mount pins with their respective holes, then clamp with ratcheting tie-downs. After a dry run it seemed possible.

No pictures because we were a bit rushed. I wanted to use a 'strong' material at the flange, but a 'sandable' material at the foam-foam join. As usual, the 10 minute work time with QF was the rate limiting/stressful step.

Of course the question of 'how much' seemed difficult to know. You don't want too little as the deck flange is only two layers of glass, so it's a bit flexible at its outer edge, and not always exactly flat (ie., a slight gap at the inner edge if you put a straight edge across). Given that you can't clean up the inside squeeze-out, you don't want too much. Just the best you can, I guess.


A rush to apply, a two person flip (now at the weight limit of what my wife wants to do), a slight jiggle to align the pin and holes . . .

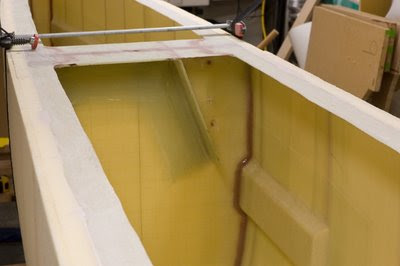
In the end we had squeeze-out along most of the outer edge. I won't know what the inside looks like until I cut the access hatches. Some areas where I had left the hull planking slightly short (from early planking when I was learning) had a larger area and consequently a void. I think this will disappear when I sand the radius to the deck edge. Next time I think mixing my own bog and having a longer work time would decrease the stress.

I found that it was important to have a slippery material between the tie downs and the foam as this ensured that the force was equalized on both sides, verses tight on the ratchet side and weak on the other.


To make the foam bow caps I first made a blank from scraps four layers thick, then estimated additional pieces for the outsides.


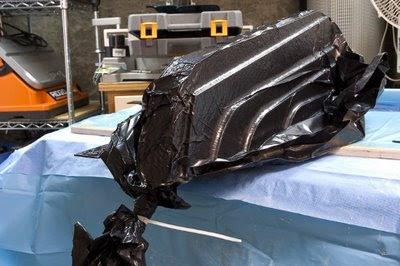
I used a large garbage bag as a 'vacuum clamp'. I think I first saw Meno do this. Two zip-ties with a twist to the bag in-between was adequate since a small leak was inconsequential.


I extended the centerline forward with a straight edge and then a plum line to make sure it wasn't cock-eyed. A little of the QF and . . .


The builder happily shaping.


I used a power planer and longboard to contour the bow. Now we're starting to look like a boat!


I had rough-faired the hull before the deck join. Two passes with the router started the shape of the deck radius. First I used a flush cut bit to remove the edge, then a 45º bit with guide to remove material to make hand sanding easier.

Friday, October 31, 2008

October

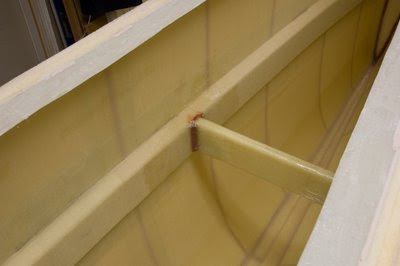
I didn't seem to get any action shots this time -- it's hard enough to get yourself in the upside down hull, let alone with a camera. I was able to accomplish all the 'inside' tasks: making fore and aft beam mounting flanges, the deck mounting flange on the center BH and transom, the compression strut between bow stiffeners, the tapping plate for the deck eye, and a sealing coat of resin along keel.


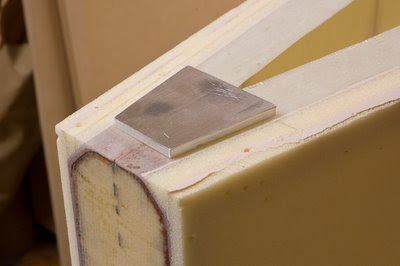
I mounted the T6061 aluminum plate under flanges (best done upside down). A trick I used in hard-to-reach areas of bow and transom: take a cloth towel in a plastic bag and shove, wedge, or brace into the small place. It works wonders to hold tape (plus or minus peel ply) in place and removes easily when the resin is cured.


Strut at stringers.


Forward and aft beam mounting flanges. I would pre-wet the glass on a sheet of plastic, then place each layer individually. For the double bias I cut the plastic around the glass then applied both, removing the plastic before the next layer. This plastic backing kept the pieces full-size as they were applied. In the smaller confines of the aft/transom area where I could sometimes only get one arm and shoulder in at a time, this helped with even the bi-directional. I finished these with the usual poor man's vacuum bag.


I wanted to shape the keel before putting on the deck in case I sanded too close to the interior laminate. I rough cut the keel foam with a Japanese pull saw, then attacked with the long board and 36 grit.


Templates at several form stations help guide the final shape. Just starting here with the keel still square.


I will make a qualification on my previous statement of the sand-ability of QuickFair. It's not exactly like foam. For the screw holes and vertical plank joins, it's as if the QF isn't there. The longboard is going perpendicular to the join at all times. Also, the join between the halves was easy. But the join where the planks butt against the keel foam required some extra attention. They're parallel to the action of the longboard and it's difficult to control the rocking motion as the board goes over the slightly harder QF. This can leave a slight hump or angle instead of the smooth curve that would naturally develop if it was exactly the same as the foam. I broke the rules and with light pressure went perpendicular to this seam just before my last pass of the board -- it disappeared.

This was my first experience with the longboard. An amazing tool. I have the 3M Hookit -- flexible. I caused myself a little grief right off the bat by turning the board perpendicular to the keel and sanding the keel to match the hull side near the bow. Of course, the side was a little low, but I didn't want the keel low there -- I just hadn't started thinking (I wanted them to match, right?). Lesson learned. You can only sand high spots, and if you use the tool wrong, you get the wrong result.


Here you can see how thin I needed to sand the foam to achieve the desired shape (that's the shadow of my hand). The plans call for some extra reinforcement if you sand to (or through) the laminate in the keel area. I decided to place an extra piece of tape on each side near the transom. You can see how using the 3/4 inch foam at the keel gives a larger flat surface, so the tape does not go up on the hull sides near the transom. I will place this extra lamination on the second float at the same time as taping the keel.


The final shape at the transom. The deck will be next, then final shaping before glassing.


I took a trip down to California to see my daughter at college. I drove straight down, toured the campus, camped at the beach with her for several days, and visited with my brother and sister-in-law.

I'll share a couple pictures to entice people to visit the West Coast. These pictures are all California -- the rest of the time I was making miles (3000 in 11 days).

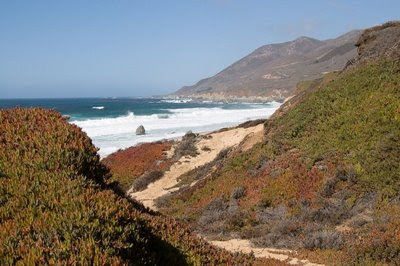
Big Sur, a wild part of the southern coast, visited on the way down.


After leaving Santa Barbara, I went to Yosemite -- a National Park and World Heritage Site. I'd never been to Yosemite. Having the Eurovan makes me realize I've done a lot of international travel, but seen only a fraction of my own country.

Taft Point (behind me is the view point) with a 3000 foot drop to the valley floor where I camped. El Capitan is in the distance across the valley. Mid 70's and sunshine every day.


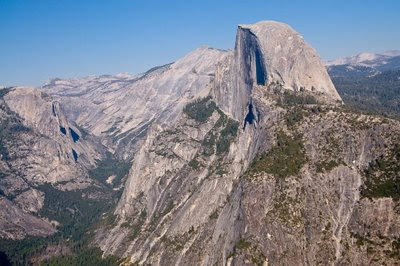
Half Dome as seen from Glacier Point. The pass to the eastern side is in the distance. So much granite!


El Capitan, Half Dome in distance, at sunset from Tunnel View.


El Capitan, at sunrise from Valley View with Merced River. One of the classic sights of Yosemite is all the waterfalls coming over the high cliffs, but there is very little water after the end of summer. I plan to return in the spring.


Cathedral Rocks by (full) moonlight, from the valley floor.


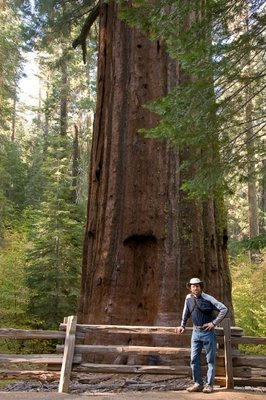
Tuolumne Grove of Giant Sequoia (largest living organism by mass, found only on west side of Sierras. The tallest is a relative, the Coast Redwood, also found in California).


I drove east across the Sierra Nevada on Tioga Pass. Here's lunch at 9950 feet. This road closed because of snow two weeks later.


Searching for Fall colors. The classic in eastern Sierra are Aspen. I was a little early, but they were still pretty. Lee Vining Valley.


Mono Lake with tufa looking at the Eastern Sierra at sunrise. The ecology of the Great Basin is amazing (200,000 square miles with no outlet to the Pacific). I stopped to hike in several more valleys, then headed north.

Tuesday, September 30, 2008

September

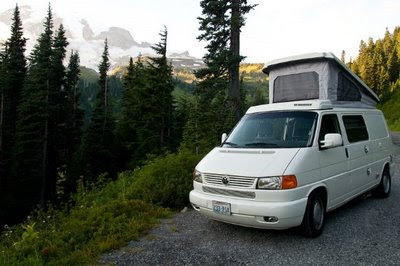
September brought a distraction -- I purchased a land yacht (on a similar size to the F-22) -- and we took a trip each weekend trying it out.

Mount Rainier just south of Seattle.


The beach on the Pacific coast, just west of Seattle.


My brother Stacy was up from Santa Barbara, CA, and he joined us for a trip to Mt. Baker and Mt. Shuksan in the North Cascades, just north of Seattle.


Camping made easy -- stove, fridge, heater, bed . . . east must be next.

Consequently, I didn't make a whole lot of progress. Here I am taping the bulkheads. The keel was taped with the boat vertical.


I hadn't had time to tape after the join, so I had placed PP along the bog to minimize the sanding -- it was a major time saver.


Here are a couple of interesting pictures of the interior while upside down. Bow with stiffeners.


Transom.


This was one of the molds I made for making the angled beam mount flange (hot glue is amazingly strong, covered in tape).


Not quite enough room to put both shoulders in. The strap holds the float down against flat part of the mold on top of the form.


Here, I placed the first two layers with PP (removed) and positioned the mold plate for the subsequent layers. I plan on filleting the groove and then placing the multiple layers in PMVB fashion.